As promised, my very first video tutorial is here.
It just so happened that this cracked nail I did a nail wrap on about 3 weeks ago, just cracked again. So, since I needed to remove the gel on the nail and do another nail wrap, I thought I’d kill two birds with one stone and dedicate some blog posts to removal and nail wraps.
I have clients all the time telling me they cracked their nails, or that they are ripping from the sides. Some will leave it for me to figure the best option. But others will feel so desperate, they do their own painful little surgery and cut the nail down! OUCH! Most of the time, the crack is so far down on the nail bed, it would hurt to cut, bleed, and can ultimately cause infections. If you are the type to panic ands cut your nails in desperation. But don’t have time or money to go to the salon, try doing a nail wrap yourself. This video is a step-by-step how-to on applying nail wraps (a.k.a. Fabric or Silk Wraps).
You can apply polish, gel polish, gel enhancement, or acrylic enhancements after applying a nail wrap to the cracked nail. Just be sure to buff the surface and free it from any oils and debris before you paint.
This video is the first one I have ever done of its kind– so bear with me! I’m nervous and not yet quite comfortable. I’m sorry, if I am rambling or stumbling on my words (I already noticed & must warn you, I say: “just,” “kinda,” and “like” a lot). I also really suck at editing. Super rough splicing. I’m also working on trying to get a better angle so you can see everything I’m doing better. Sorry, it’s a bit of a long vid– I’ll try to incorporate the “fast forward” feature next time.
I hope to post a video at least once a month, so hopefully a few more tries and I’ll be an expert! Ha!
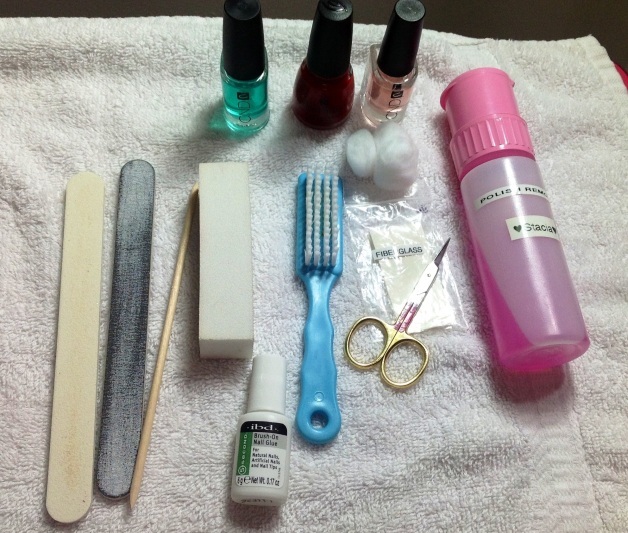
Things You Will Need:
**All but the fabric can be purchased at your local drugstore. Fabric can be found online.

Let’s begin! Click the link below:
Thanks for visiting, and remember to keep your claws modish!
Xoxo,
Stacia